Building an Autonomous Agent That Can Run Terminal Commands
What Makes an Agent Autonomous?
An autonomous agent is an agent that can make independent decisions to accomplish tasks—without constant human guidance.
But how do we measure the level of autonomy an agent has?
The answer lies in the variety of tasks an agent can perform on its own.
Consider an agent that has a single tool—the ability to write files. That's one degree of autonomy. It can create content, save it, and that's about it.
Now consider an agent with access to a terminal. Suddenly, the possibilities explode:
- List files in any directory
- Read and write files
- Execute scripts and programs
- Install packages
- Interact with git repositories
- Make network requests
- And much more...
This is a high degree of autonomy—which, as we'll discuss, comes with both incredible power and important security considerations.
This is basically the idea behind modern coding tools like Claude Code—or even better, OpenClaw.
The Core Concept: Tool Execution Loop
The main thing we need to enable is an implementation for executing tools in a loop.
I'll use a library I built for this—@mozaik-ai/core—a TypeScript framework for orchestrating AI agents.
With Mozaik, we can easily equip an agent with tools. So we just need to create a terminal tool for executing commands.
Creating the Terminal Tool
First, let's define the terminal class that will give our agent the ability to execute shell commands:
import { spawn } from "child_process"
export class Terminal {
	runCommand(command: string, cwd: string): Promise<CommandResult> {		return new Promise((resolve) => {			const [cmd, ...args] = command.split(" ")			const process = spawn(cmd, args, { cwd, shell: true })
			let stdout = "", stderr = ""
			process.stdout?.on("data", (data) => stdout += data.toString())			process.stderr?.on("data", (data) => stderr += data.toString())
			process.on("close", (code) => {				resolve({					success: code === 0,					stdout: stdout.trim(),					stderr: stderr.trim(),					exitCode: code ?? -1,				})			})		})	}}
Now we define the tool that will give our agent the ability to execute shell commands:
The tool is straightforward: it takes a command string, executes it using Node.js's child_process module, and returns the output.
const terminal = new Terminal()const tools: Tool[] = [ { name: "run_command", description: "Run a command in the terminal.", schema: { type: "object", properties: { command: { type: "string", description: "The command to run in the terminal." }, cwd: { type: "string", description: "The current working directory." }, }, required: ["command", "cwd"], }, async invoke({ command, cwd }) { console.log(`Running command: ${command} in directory: ${cwd}`) console.log("--------------------------------") const result = await terminal.runCommand(command, cwd) return result }, },]Attaching the Tool to an Agent
Now we attach the terminal tool to our agent:
const request: MozaikRequest = {	model: "gpt-5-mini",	tools: tools,}const userRequest = `Analyze the github respository and update the README.md file with a high level description of the project.`
const task = `You are a terminal agent.
You can run commands in the terminal to help the user with their request. Do not ask any questions to the user. Just run the commands and return the result.
Tools:- run_command: Run a command in the terminal. You can use this tool to run any command in the terminal.
User Request:- ${userRequest}`
const agent = new MozaikAgent(request)const result = await agent.act(task)
Watching the Agent Work
Let's give the agent a task and watch it work. Below you can see what happens step by step—the terminal commands the agent autonomously executes to get the job done.
const userRequest = `Look at this folder and tell me in one sentence what it does — like you're explaining it to someone who has never written a line of code.`The agent breaks it down on its own. It runs two commands to get the job done. The first command lists the files in the current directory, and the second command reads README.md to figure out the purpose of the project.

Now, let's give the agent a more complex task:
const userRequest = `Analyze this directory and write a detailed description of the project in a file called purpose.md.`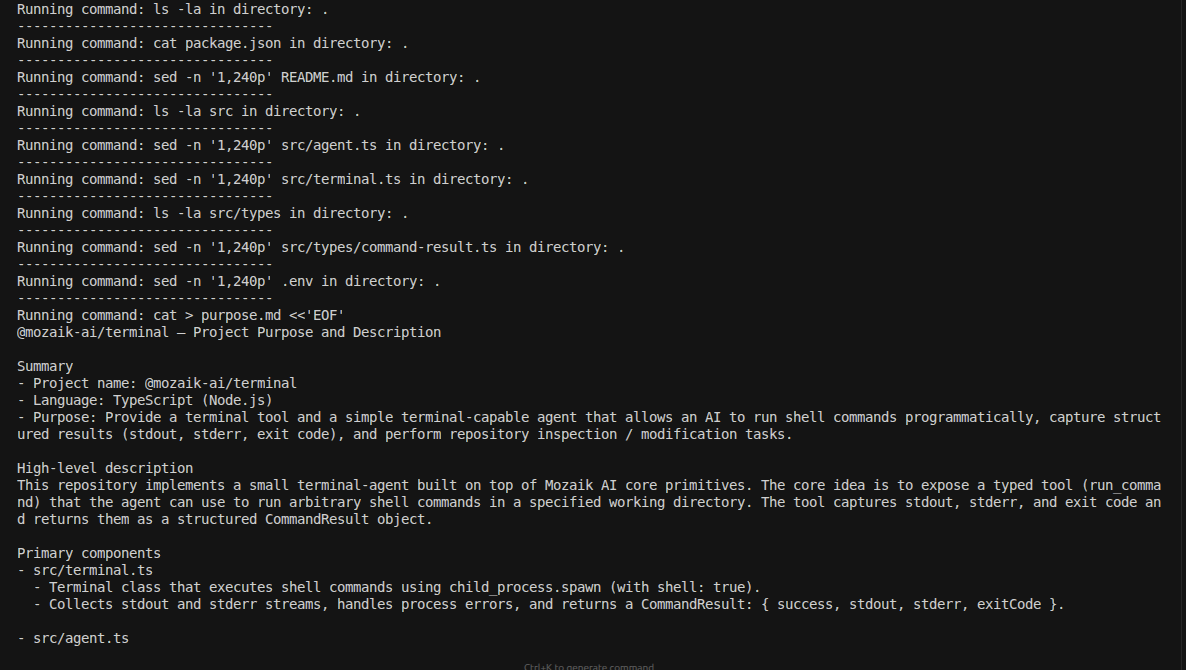
Security Considerations
With great autonomy comes great responsibility. Terminal access is powerful—but it can also be dangerous if not properly controlled.
The balance between autonomy and safety is a spectrum. Start with tighter controls and expand as you build confidence in your agent's behavior.
Final Thoughts
Building an autonomous agent with terminal access is surprisingly straightforward—the core pattern is just a tool execution loop.
What makes these agents powerful isn't the complexity of the implementation, but the emergent capabilities that arise from giving an LLM access to a shell.
The agent doesn't need to be explicitly programmed for every scenario. Give it a goal, give it tools, and it will find a way.
The prototype, which is in an early stage, is available in the GitHub repo:
github.com/jigjoy-ai/terminal-agent
The best way to predict the future is to invent it.
